
Configure Your LMS with the SynchedLearning API
The Nimble AMS SynchedLearning Application Programming Interface (API) Integration will enable you to streamline your business operations by enhancing your member experience through a seamless workflow. Members can purchase a training course in Nimble AMS and quickly have it available to access in your Learning Management System (LMS). In addition, the API will also enhance your staff experience by allowing LMS systems to pull in LMS product information from Nimble AMS.
Lastly, the API also supports adding custom fields to all endpoints through the use of Field Sets that will prevent the need to write new code.
Prerequisite(s)
To install the SynchedLearning API package, please submit a support case. If you are looking to add additional fields to the API response. the Setup Package must be installed as well.
Configuration Steps
These steps will walk you through the process of assigning a permission set to the user, updating page layouts, and configuring Single Sign On (SSO) by using Community Hub as the identity provider. This procedure will enable your association members to log in to your association site and only be required to enter their credentials one time to access your LMS and our Community Hub site.
Assign permission set to the Integration user
To allow you the ability to integrate our LMS REST API, we will need to assign a permission set.
Assign the Nimble AMS LMS API permission set to the integration user.
Generate Security token
Follow the steps below to generate a security token for the integration user identified in the previous step. This token will be used by the LMS System to authenticate and connect to the Nimble AMS org.
Generate login credentials for the integration user, if needed.
Log into the Nimble AMS org as the integration user.
Click the Profile icon on the right-hand side corner.
Click on Settings.
Click on the Reset My Security Token option and
Click on the Reset Security Token button.
An email will be sent with the new security token.
Note down the token value to provide it to the LMS system.
Update page layouts to include new LMS fields
To make your LMS and Nimble AMS work together, the Order Item Line and Product page layouts need to be updated to include the new LMS fields. See Tables 1 and 2.
To add fields to a page layout navigate to Setup → Object Manager
Navigate to the Object you want to add the fields to the layout.
Click Page Layouts in the sidebar.
Add the fields to the page layout.
Field | Value |
|---|---|
| LMS Completion Status |
|
| LMS External ID | nams__LMSExternalID__c |
| LMS Sync Status | nams__LMSSyncStatus__c |
Table 1. New Order Item Line Fields
| Field | Field |
|---|---|
| LMS Product Type |
|
| Sync with LMS | nams__SyncWithLms__c |
Table 2. New Product Fields
Create your connected app for Community Hub to be your identity provider
The next stage of this procedure is to configure Single Sign On (SSO) by using Community Hub as your identity provider.
Click on the link to follow the steps.
Create your connected app for the LMS to connect to our API
The final stage of this procedure is to create your connected app for the LMS to connect to our API.
Create a Connected App for API Integration
Go to Setup → App Manager → New Connected App.
Next, follow the screenshot (figure 1).
Here are the settings information:
Enable OAuth Settings should be checked
Callback URL should be the callback for the LMS
Selected OAuth Scopes should include API
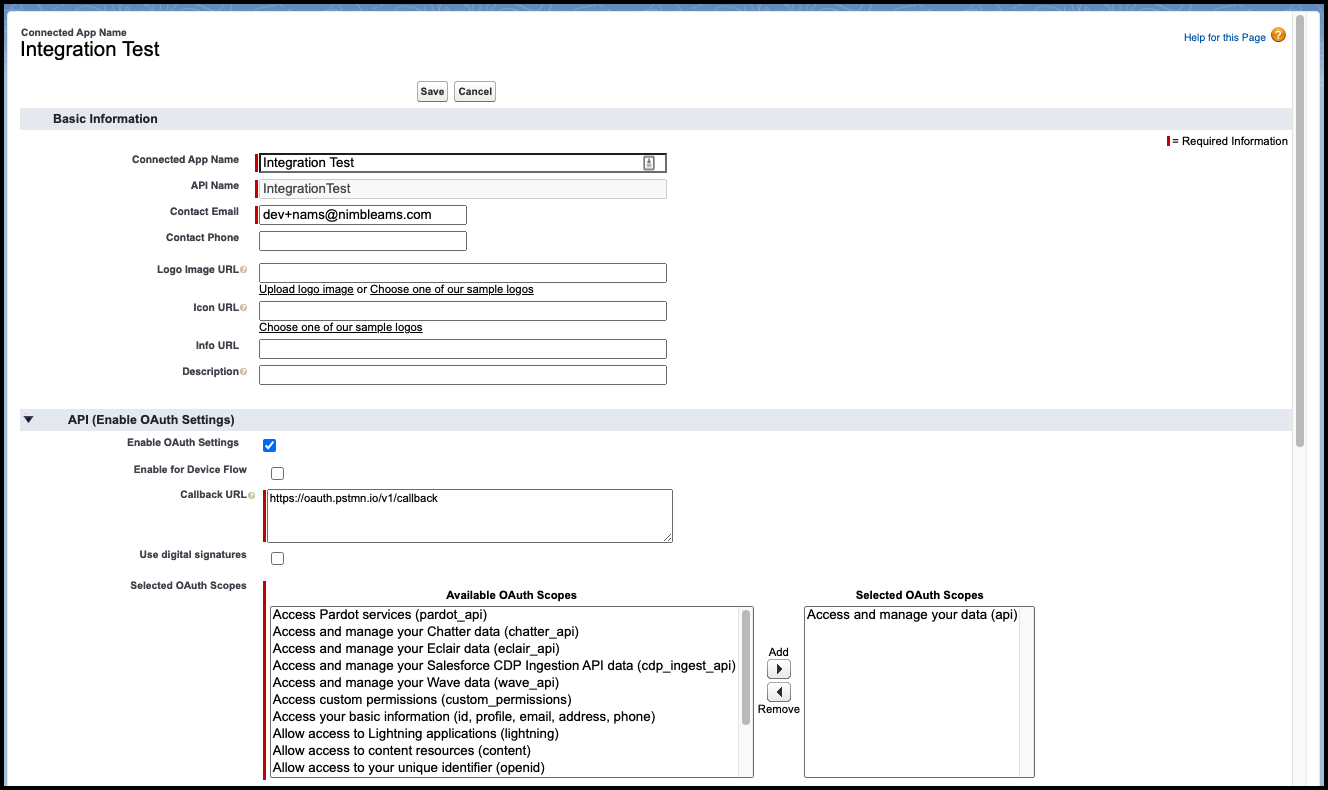
Figure 1. Connected App Name screenshot
Include Custom Fields
The LMS API also supports adding custom fields to all endpoints through the use of Field Sets. This includes the GET endpoints in addition to the purchase sync POST endpoint.
Custom fields are added to the response payload in a custom object key.
When syncing purchases back to Nimble AMS, the custom object key can also be included in the payload.
To create a Field Set in the Order Item Line, go to Setup → Object Manager → select Order Item Line from the list (shown in figure 2)
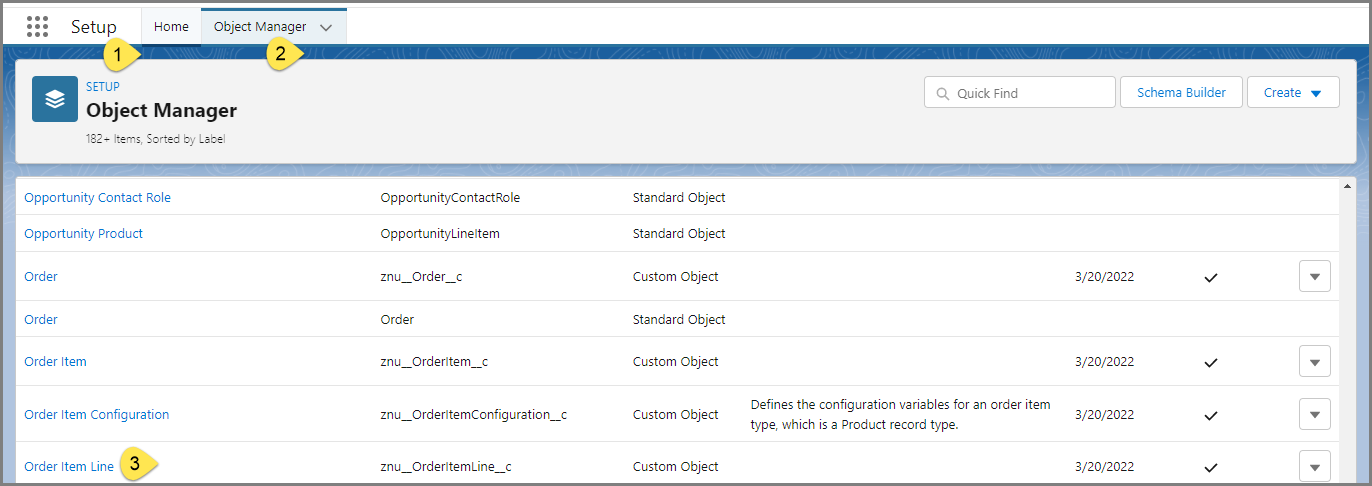
Figure 2. Navigation path to the Order Item Line
2. Next, select Field Sets → Click on New (shown in figure 3) to create a new one (if necessary) OR update an existing one, if appropriate.
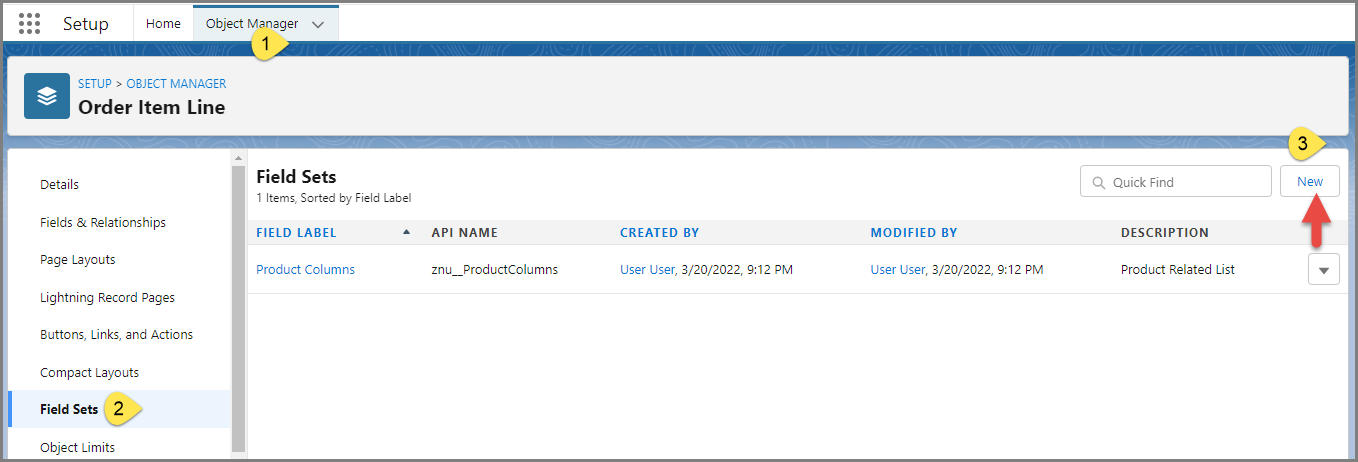
Figure 3. Field Sets page where you can create a new one (if necessary) by clicking on New
Make a note of the Field Set API Name (shown as an example in figure 3) that will be used in a later step and repeat step 1 to add more fields from the Product Object.
The fields from the Product and Order Item Line objects (shown in figure 4) must be included in the Field Set defined in setup.
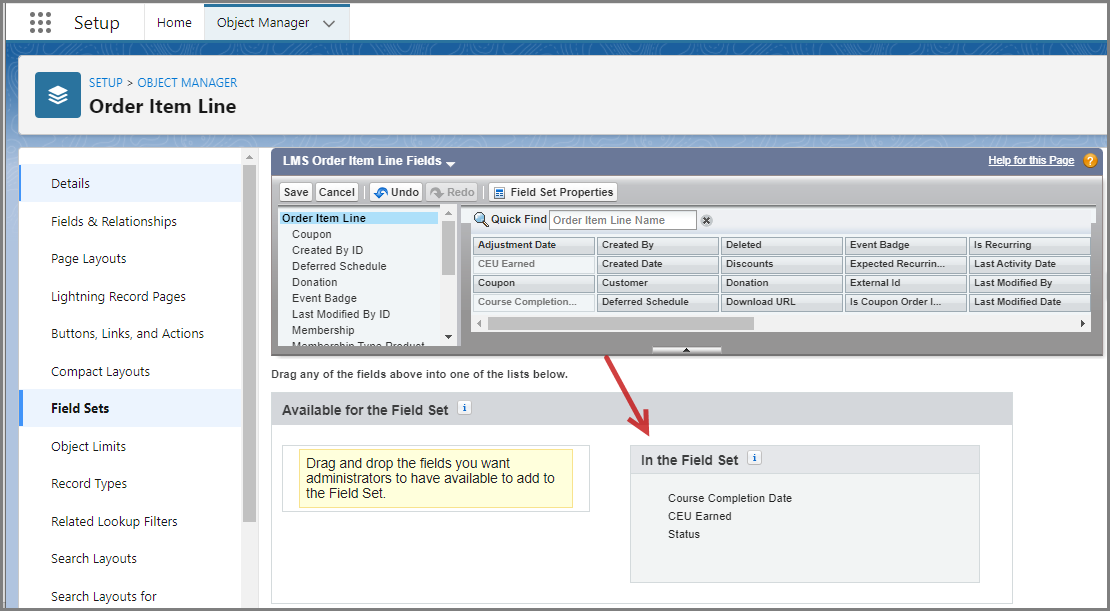
Figure 4 . Fields that can be dragged to one of the Field Set lists
To configure the Field Sets, you will need to first have the Setup package installed to access the setup UI.
Next, navigate to the NAMS Setup app.
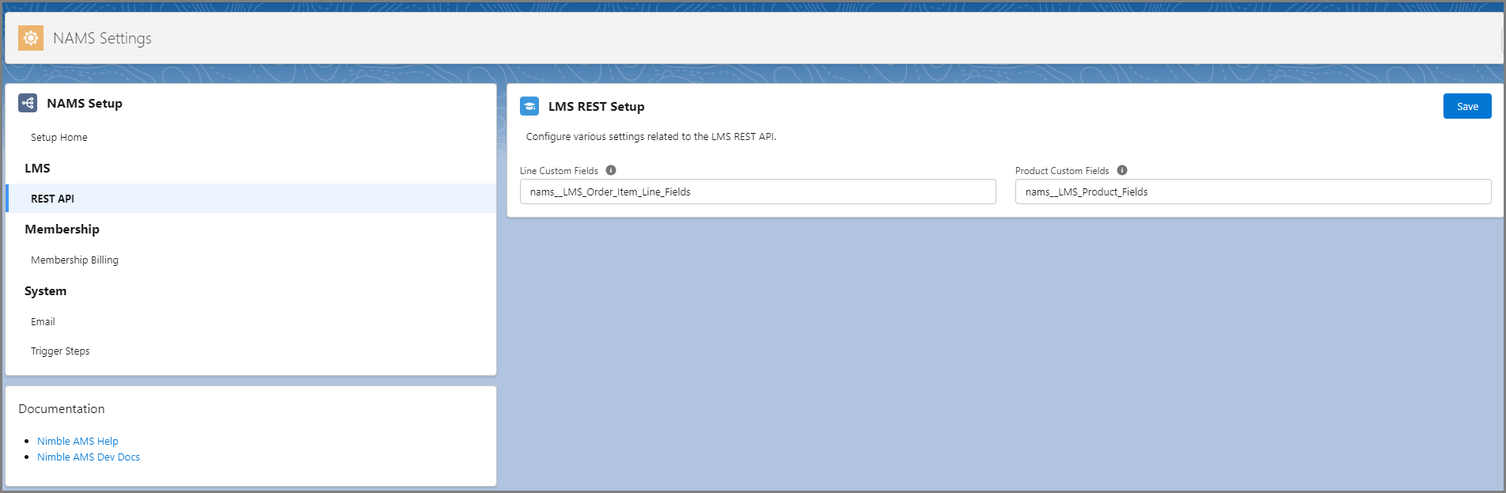
Figure 5. Field Set API Names
On the page shown in Figure 5, you can set the Field Set API name to include in the Products endpoints, as well as the Field Set API name to include in the Purchases endpoints.
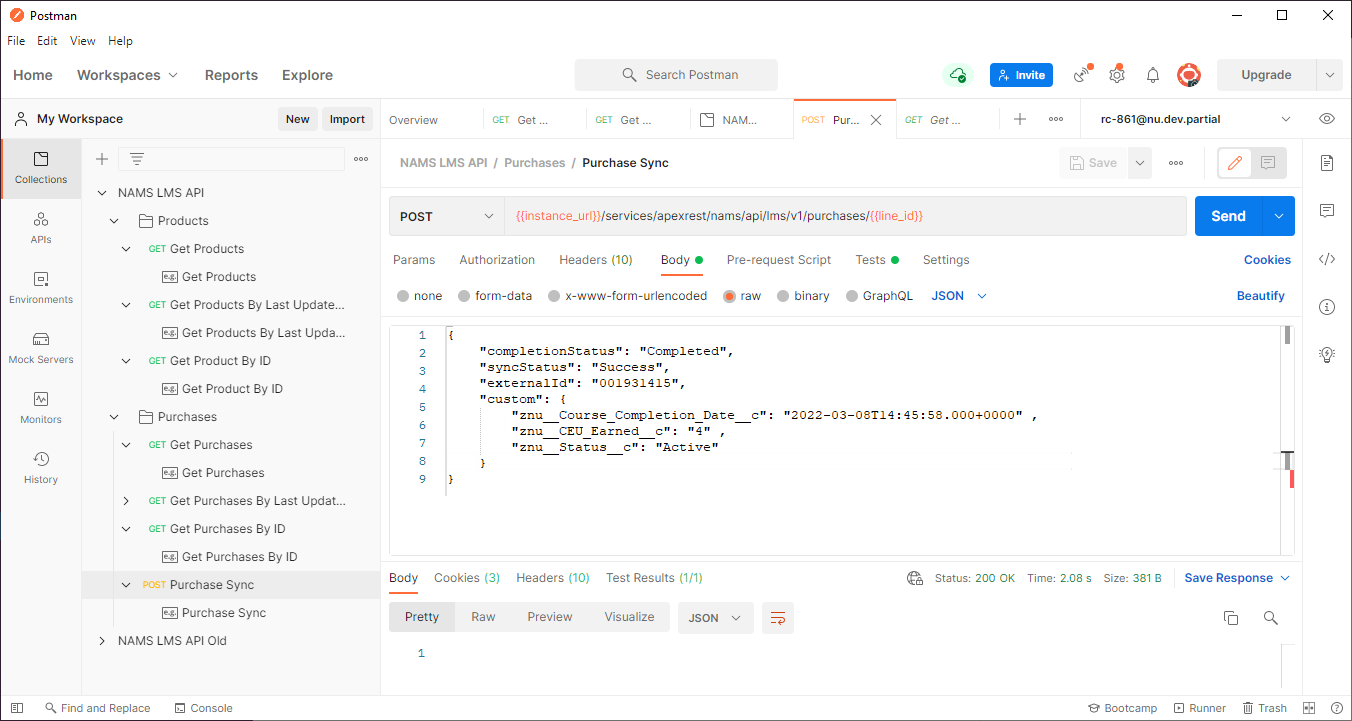
Figure 6. Screenshot that shows the fields (under Custom) that are included in the response when the LMS system uses the API
These are the responses that our client will return to your system from the different API calls
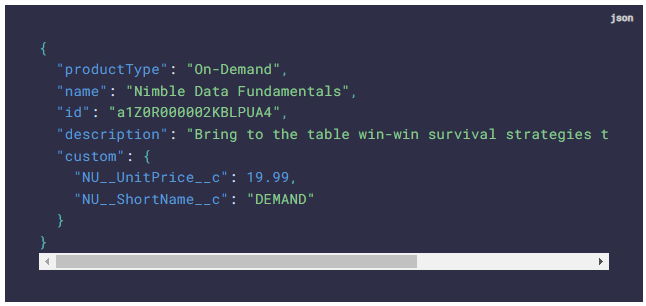
Figure 7. Example screenshot that shows data that returned in response to a GET call after a product was purchased
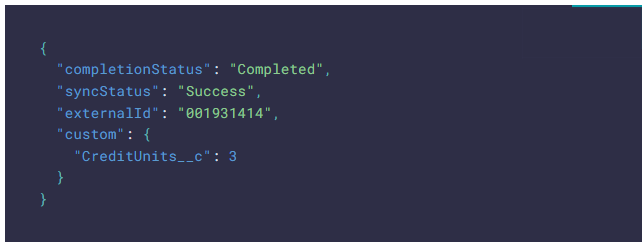
Figure 8. Outcome that shows a successfully-completed purchase sync that correlates with the steps in the previous section