This page will walk you through how to create and configure a Lightning Store for your association.
Prerequisites
A Community Hub site.
Upgrade your Community Hub community to a Lightning Community.
Pre-requisite
Prerequisite: Upgrade Community Hub to a Lightning Community
Skip this step if your Community Hub has already been upgraded to a Lightning template. Administrators can verify if the upgrade has been successful by going to Communities - All Communities and checking that Builder appears as a link next to Community Hub.
As this is a large change we recommend that you test this change in your staging environment for Community Hub first, and check that everything continues to function as expected before implementing this in a production environment.
Navigate to Setup > All Sites.
Locate your Community Hub in the list.
Click workspaces next to the Community Hub.
Select Administration.
Select "Change Template" and select yes to dismiss the warning message as it's not applicable.
Select the "Build your own" lighting template.
This will update your Community Hub to use the new Lightning functionality.
Get Started with Creating and Configuring a Lightning Store
Terms to Understand
Product Grid
Displays the products in your store.
Product Details
Displays specific details about the selected product.
Product Grid Filter
Displays the available category filters for the product grid on the same page. It works with the product gridLightning Web Component (LWC), and cannot be on its own.
Please ensure you are logged in to Community Hub as a system administrator to access Builder Functionality. Please also ensure you have at least 1 product in your organization that you can populate in the store. You can easily change this later on, update or replace it. This is to allow you to see in real time the product grid functionality.
Overview
Association administrators can create an online store using Drag and Drop functionality in Community Builder. Combining the Product Grid and Product Details components will enable a customer workflow for browsing products, making selections, and purchases.
1. Set Permission Sets and Profiles
Uncheck Send Welcome Emails
Please uncheck 'Send Welcome Emails' on the Emails tab from Administration in Community Builder before setting permissions, otherwise an email will be sent out to all Community Hub Login Users.
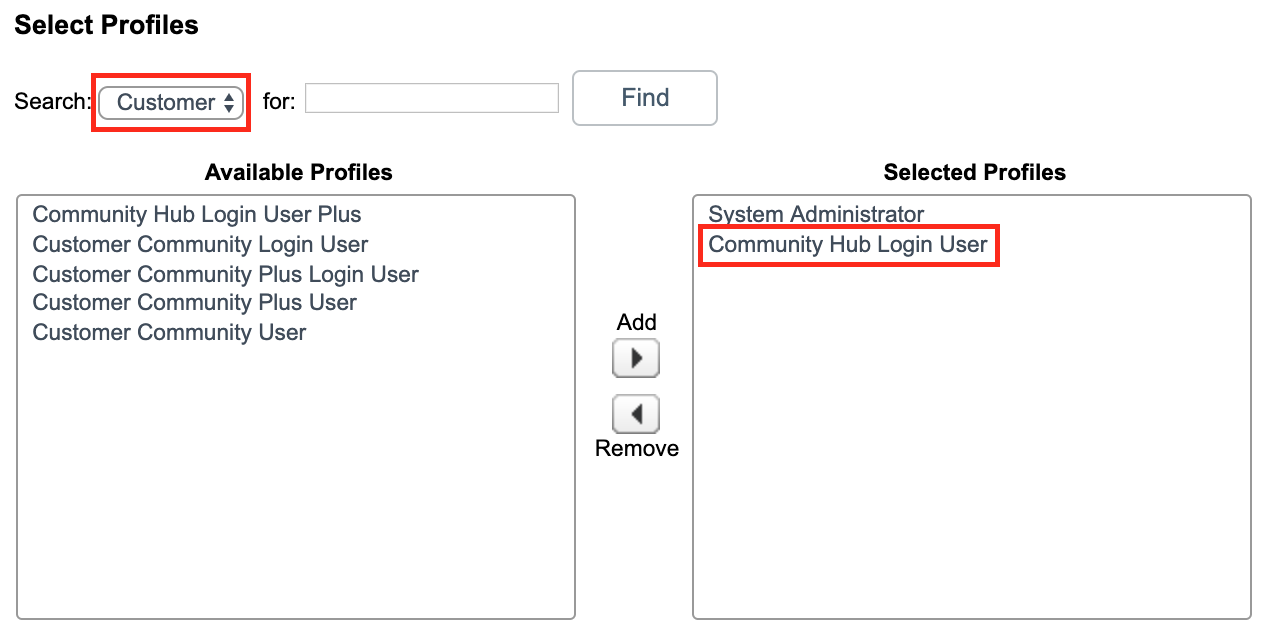
In Community Builder, under Administration → Members you will need to select the profiles under Customer for Community Hub Login User to allow access to the Lightning Store.
Fig 1.0
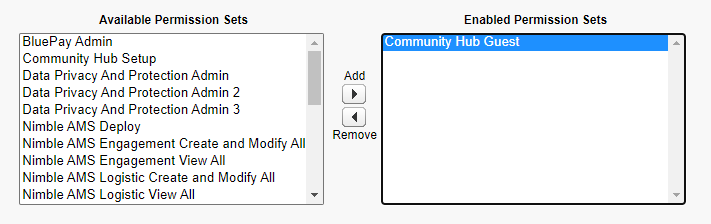
2. Ensure Permission Sets are assigned to Guest Users
Perform the following settings for Lightning Community so that, the guest users are able to access products on theLightning Store:
From Setup, enter All Sitesin the Quick Find box, then select All Sites.
Community Hub Guest: This permission set will allow guests on Lightning Community or Community Hub to view products on lightning store without logging in. However, to purchase products, guest users must log in to Lightning Community or Community Hub. They can do that from the Product Details page by selecting Login and Add to Cart.
3. Configure products to appear in the Product Grid Component
Data Source
By default, you are provided with a Data Source "Lightning Store Data Source". You will not need to modify this for a basic store.
Navigate to the Merchandise app > Products tab in Staff View.
Select and edit your chosen product. This product will be configured to appear in the Lightning Web Store.
Verify your product has the following selections (this will enable the logic to include this product in the default Data Source). Verify your product has the following fields available on the page layout if not already available.
Product Record Field
Value
Reason
Status
Active
Field is set to active.
Self-Service Enabled
True
Allows products to show up on the Lightning Store page.
Entity
Matches your Community Hub Entity
This field allows the Lightning Store to sell products through the primary entity for your Community Hub.
Can Not Be Sold Separately
Checked/Not Checked
Depending on the choice a product can be sold separately on its own in addition to being a product variant or it can be suppressed from being sold on its own. If checked the product will not appear on its own in the Lightning Store.
4. Create the Lightning Store
Setup - All Communities.
Navigate to your Community Hub.
Click Builder to open the Builder console.
From Builder, open the components module on the Home Page (Click on Components), and select the Product Grid item. Drag this to your page.
You may encounter a CSP error. CSP errors are standard anytime a user links to a source outside of SF. In this case, the grid contained products that had images hosted on an external server. The error message is SF generated, letting the user know that they are linking to an external source and need to add that site to the CSP trusted sites list before proceeding.
Open the components module again (Click Components) and select a Product Grid Filter item. Drag this to your page to display the available category filters for the product grid on the same page. (Optional).
Flexible Page Layout
If you are using a standard page layout you should update to the flexible layout to provide maximum flexibility in designing your page's look and feel.
Result
You will now have the basic structure created for a Lightning store.
5. Configure the Product Grid Component
The configuration for the Product Grid will appear on the right-hand side of the site in Community Builder.
Set Data Source: LightningStoreDataSource will automatically populate in the DataSource field of the component.
When you select a Data Source, any products configured for that source will appear in the grid. By default, the LightningStoreDataSource will display any merchandise product set with self-serve enabled = TRUE.
Set Items Per Page
By default, Items Per Page is 12. If you would like a smaller or larger grid, change this value.
Set Product Details URL by copying the URL from the product details component, once that has been created.
6. Configure the Product Grid Filter Component
Categories that are displayed in this Lightning Web Component (LWC) are fed from the categories assigned to the products in the grid. There is one configuration element in community builder - the label for the header (e.g. Category) which can be changed if desired.
The Product Filter will appear embedded in the left column.
7. Configure the Product Details Component
By default, the Product Details component is configured to use a checkout URL of "nc__checkout" in the Checkout URL field of the component.
You should update this field to the following URL: "/communityhub/nc__checkout" to successfully use the Lightning Store to checkout products.
The product details page will contain the Product Details Component.
When a user clicks an item in the Product Grid, they will be shown the Product Detail page with corresponding product information. By default, the Product Details component is configured to direct the user to the default Community Hub checkout and login pages. If your org uses a customization, please verify that the URLs are configured correctly for your specific implementation.
Go to Page Properties under the Home dropdown.
Create New Blank Page - Standard Page - Format (Flexible Page Layout) - Name new page (e.g Product Details - the auto-generated url below the name will act as your URL on the Product Grid Configuration).
Click on Components
Select Product Details.
Drag and drop onto Content Grid.
After adding a Product Details component on to your page, the configuration module will open. Here, you can configure various warning labels and thresholds using the fields on the component to show information to your customers regarding the items current stock levels and availability.
Gut-Check
Once you have completed the setup of the Products, Product Grid and the Product Details Pages, you should preview your community and verify that it looks and functions correctly.
Reminder
Remember to set up profiles and permissions for the Community before publishing. You can access documentation about setting up Communities here (external).
Configuring product description in Rich Text
Rich text field support has been added to the Product description in the Lightning Store. You can add the new field to the product layout and update the product description in Rich Text (bold values, images, etc.) for each product separately.
Modify any necessary Profile and Permission Set for Community Hub Users with the following: • On the NU_Productc object grant access to the NUDescriptionRichText_c field
To configure Rich Text Description, follow the steps below:
From Setup >Object Manager, enterProductin theQuick Findbox, then selectProduct.
From left navigation, selectPage Layout.
EnterProduct in theQuick Findbox, then selectProduct.
FindDescription (Rich Text) in theQuick Findbox, then drag and drop to the layout section.
ClickSave.
Expected Result Product description should now display in Rich Text (bold values, images, etc.) on lightening store page.
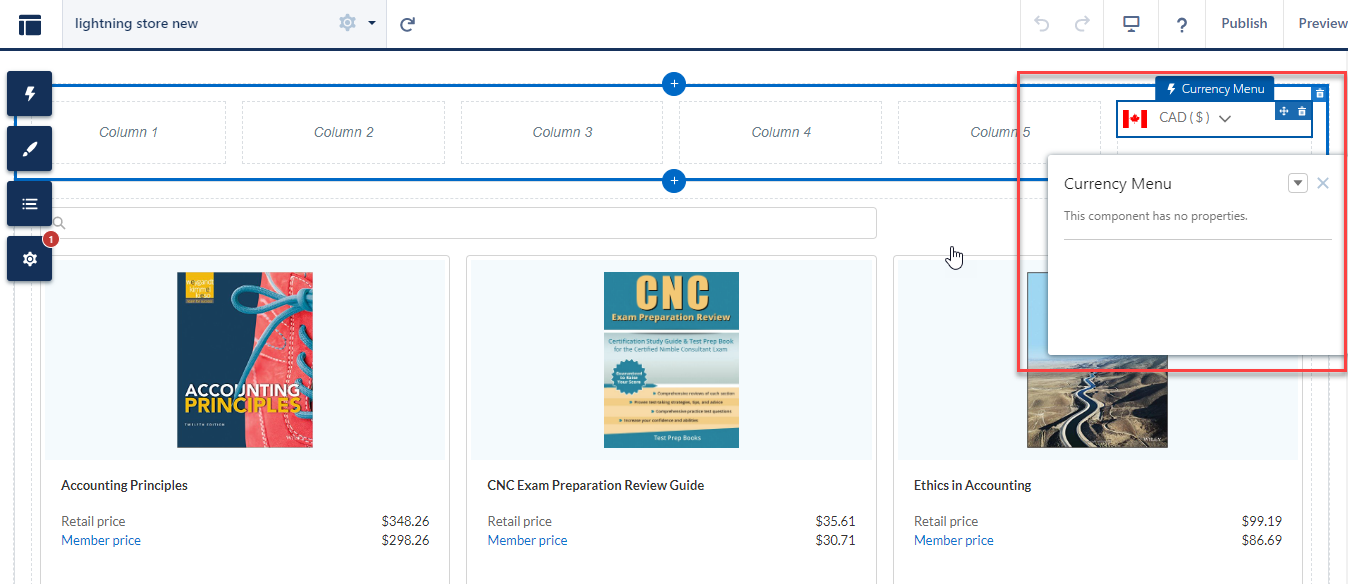
Lightning Store Display Currency
For associations that need to trade globally, theability to interact and engage with people internationally provides a huge opportunity for expanding their member base and growth opportunities. For the community hub users to be able to see product prices and experience purchases in their preferred currency, administrator must enable Internationalization. In addition to that, the staff must configure the Currency Menu LWC on the Lightning Store and Product Details pages using the app builder, for the currency menu to be visible to community hub users, as given below:
From Setup, enter All Sitesin the Quick Find box, then select All Sites.
ClickBuildernext to Community Hub.
From the pages dropdown in top menu, select the Lightning Store page.
Click Components from the Menu.
Scroll to Custom Components section.
Drag and drop the Currency Menu component onto the page.
Show Me How It Looks...
Using the currency menu drop down, the community hub users can select their preferred currency from the list of available currencies set up by the organization. They will then be able to to see the product prices in, and experience purchase in their preferred currency. However, the financial calculations in Nimble AMS will still take place in base currency.
Lightning Cross Sell
Displaying relevant product or service suggestions to constituents when they browse for products on the lightning store, is a great way to help them find what they need. Also, you can increase sales and improve the customer experience by offering alternate product or service suggestions. To do this, enable the Lightning Cross Sell feature.
Lightning Carousel, being a mutually beneficial feature, will enhance member engagement, as well as profits for your organization.
Publishing the Site
First Preview the site by clicking on Preview.
Then Publish the site using Publish.
By default, the Lightning Store will be accessible behind a login. To change this you can click the gear in the left menu for Settings, General, and check the Public can Access community checkbox in Community Builder.
Please note the site is in a preview status until it moves to active on the status page in All Communities. You can still copy and paste the URL to view it in preview.
A communities status is set to Active once it is published. To activate, go to workspace administration in Community Builder.
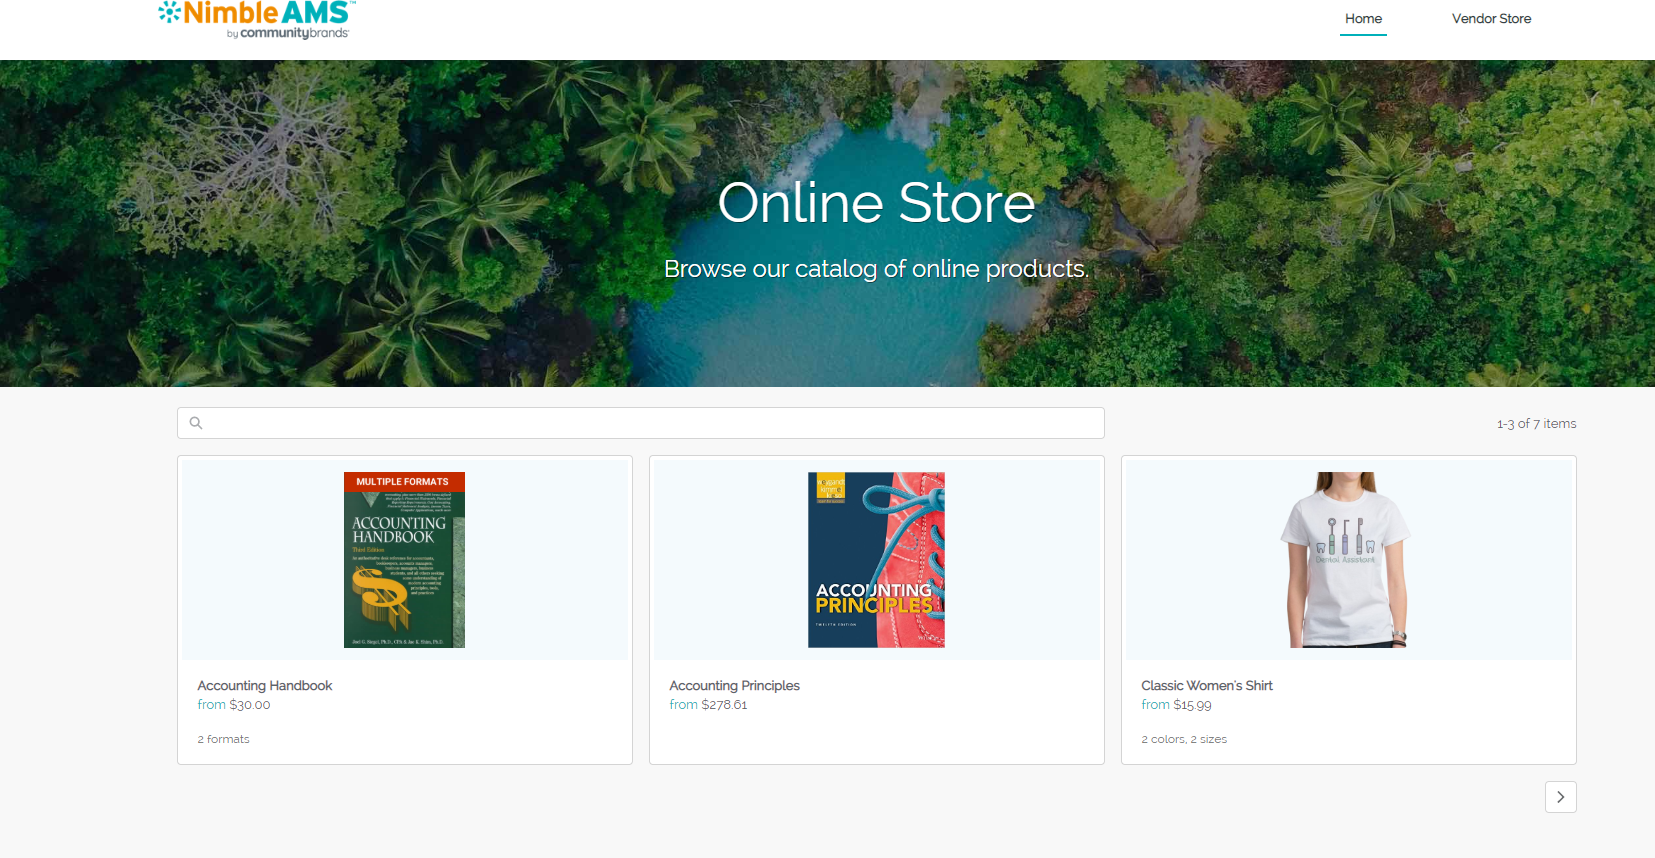
Customer Experience: What a storefront may look like
A site storefront with the ability to purchase merchandise and parent products will be available when logged in (Fig 1.2)
Members can view item details, add them to their cart and proceed to checkout in Community Hub. (Fig 1.3)
Fig 1.2 A representation of a base storefront.
Fig 1.3 Adding items to a cart and going seamlessly from the Product Details page to the Checkout page.
WCAG Compliance in Communities
We recommend following the WCAG guidelines while creating new communities or pages to make content more accessible to a wider range of constituents, who have disabilities, or age related issues in accessing the communities. Web Content Accessibility Guidelines WCAG 2.1 (external) define how to make Web content more accessible to people with disabilities.